Saturday, December 22, 2012

Crisp Christmas Sugar Cookies

...otherwise known as Calm Water Cookies, only because I have serious doubts about making them in any sort of rolly anchorage. I actually had my doubts about making them on the boat at all because every year when we make these my kitchen looks like the Pillsbury Dough Boy exploded. But I decided to try anyway because this year I was only going to make 2 kinds of regular cookies for my husband since I had busied myself the whole baking season with making allergy diet legal cookies for my 2 grandsons who are suffering due to food allergies. These are my husband's favorites, and this was the only time I had to make them, so onward I went. It turns out that when the cookie making doesn't involve people under the age of 10, it's a lot cleaner. Who knew?

This cookie is a very delicate, crisp sugar cookie that has a wonderful texture and a very mild flavor when not iced. You can brush the dough with milk and sprinkle colored sugar crystals on top after you cut them out and put them on the baking sheet but before baking. You can also ice them with the icing below which hardens into a sugar coating. I much prefer them plain, but everyone has different tastes. When iced they are impressive as a gift or for that office party <cringe>. They are also excellent with a corner or half dipped in melted chocolate and then finely ground walnuts sprinkled into the chocolate before cooling. The real shame of it is that I seldom make these except for the holidays, yet they make a wonderful every-day cookie.

Ingredients:


1-1/2 cups powdered sugar
1 cup butter, softened
1 egg
1 tsp vanilla
2-1/2 flour
1 tsp soda
1 tsp cream of tartar

Directions:


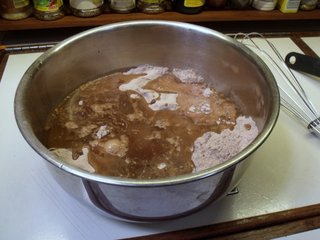
Beat the butter in a bowl till creamy.  Add the powdered sugar a half cup at a time, mixing well in between. Add the egg and vanlla and mix well. (Sorry I don't have a picture of this step. I was distracted by something and totally forgot) Mix the flour, soda and cream of tartar together and add to the wet ingredients. Blend till incorporated but do not overmix.


If you don't have cream of tartar, don't attempt to make the cookies. I thought once, "what difference can 1 teaspoon of cream of tartar possibly make?" and promptly found out. The cookies were heavy and tasted profoundly different.


Place the dough in a ziploc or plastic container and chill at least an hour. Divide dough into quarters. While rolling out one quarter, keep the remaining 3 in the ziploc so it doesn't dry out.


Roll the dough out fairly thin, about 1/8", on a lightly floured surface. I cover my table with waxed paper or freezer paper or parchment. If you roll them thin, they take less time to bake and will be crisper. If you roll them thicker, allow a minute or two longer in the oven. They will be softer after being baked.
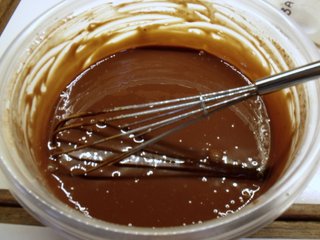
Cut with cookie cutters that you have dipped in flour. Gently transfer the dough to a cookie sheet lined with parchment. Either an air bake or parchment lined pan will work, but these will stick on most anything else. Bake at 375° for 6-9 minutes depending on the thickness you rolled the dough, the temp of your oven, and the color of your cookie sheet. Watch them carefully as they burn quickly. Once you've done one batch you'll know what to set the timer for next. If you use parchment, you can have the next batch ready to go by the time the first one is out. Slide the parchment off the hot pan and slide the next one on. These means no dirty pans and a quicker transfer. One word of caution, though. If you put cookies on a hot pan you will need to reduce the time you bake them. After removing the parchment to a cooling rack, allow them to cool completely then ice with cookie icing.


Cookie Icing

2 cups powdered sugar, sifted
1 Tbl honey
2-3 Tbl milk
1 tsp vanilla


(Sorry about the blurry picture!)
Sift the powdered sugar to remove any lumps. Put 2 cups in a bowl and ad the honey, vanilla, and 2 Tbl milk. Add as much more milk as necessary to get a slightly thick mixture that you can still stream from a fork. Remove a small amount into two small bowls and color one red and the other green. You will need to use the gel style colorant in order to get it dark enough without thinning it out too much. Ice the cookies one at a time with the white base and then drizzle the color from a knife or fork onto the cookie. Be creative. You can make some awesome designs by pulling a toothpick across the color after you drizzle it on. Allow the cookies to dry completely and the icing is hard to the touch. Store in an airtight bag or box. These freeze very well.


Saturday, December 8, 2012

Crisp Cornmeal Waffles

It was one of those mornings that call for something warm wafting from the galley. I was standing at the galley porthole that sits over the stove, waiting for my coffee to drip into my cup. (Because I drink decaf and my husband drinks regular, we use a single cup drip coffee maker most of the time.) It was cool and foggy outside the porthole, warm and pleasant inside the boat. I decided we hadn't had waffles in awhile and dug out my cornmeal waffle recipe. These are wonderfully hearty, crisp waffles with a fabulous aroma. They mix in one bowl, keep well and reheat well, and are a good afternoon snack just cold. I use a stove-top cast iron waffle iron that works well on a boat stove but they can be made in an electric iron as well. If you're using a cast iron model in a boat, you have to remember to grease both the inside and the outside before you store the iron to prevent rusting. I usually grease a paper towel and sandwich it between the iron halves and put the whole greasy mess in a ziploc bag. Just wipe the outside before putting it on the burner so the grease doesn't catch fire.Waffle irons vary wildly in cooking time so you have to learn your own waffle iron's requirements.

Ingredients:

1-3/4 cups all-purpose flour
1-1/2 cups yellow cornmeal
1 Tbl baking powder
1/4 cup sugar
1 tsp salt
2 cups milk
3 Tbl vegetable oil
2 large eggs

Directions:

Put the dry ingredients into a large bowl. Whisk together. Add the wet ingredients and whisk until smooth. Preheat waffle iron and grease liberally. Use a 1/4 cup of batter for a small iron, 1/3 to 1/2 for a large one. If using a stove-top iron, put the batter in the iron, close, and immediately flip over. Check for doneness in 2 minutes and flip. Cook till golden brown. Serve them with butter and maple syrup.


Saturday, November 3, 2012

3-Hole Chocolate Cake and Chocolate Ganache Frosting

This cake is an old old family recipe and is absolutely my favorite chocolate cake on this earth. It's simple to make, bakes well, is moist and chocolaty and has a good crumb. It tastes great just by itself, dusted with powder sugar, or frosted. It keeps well (although rarely lasts long), freezes and thaws well, and I promise will become your favorite one too.

Today I was making it for a Halloween party at our marina, so I decided to make mini cupcakes instead. I also decided to use a chocolate ganache for the frosting, one that I have become very fond of, a recipe from Cooks Illustrated. The chocolate ganache has only 2 ingredients - heavy cream and dark chocolate - and it tastes like a piece of heaven.  I hope you enjoy them both as much as I!

Make the ganache before you make the cupcakes so that it has time to chill while the cupcakes bake. This recipe is a half recipe and makes 48 mini cupcakes. If you are making a 9 x 13 or jelly roll sheet cake you can double it. Adjust your baking time accordingly.

3-Hole Chocolate Cake

Ingredients:

1-1/2 c. flour
1 c. sugar
1 tsp soda
1/4 tsp salt
3 Tbl cocoa
6 Tbl oil
2 tsp vanilla
1 tsp vinegar
1 c. water

Directions:

Sift the flour, sugar, soda, salt, and cocoa into a large mixing bowl.


Make 3 wells in the dry ingredients. Put the oil in one, the vanilla in one, and the vinegar in one.


Pour water over it all.


Mix well but briefly. The batter will be thinner than cake mix batter.


Line mini muffin tins with paper liners and fill 3/4 full with batter.


Bake at 350° for 13-15 minutes or until toothpick inserted in center comes out clean. Remove from pan immediately and cool on rack. Frost if desired.


Chocolate Ganache

Ingredients:

8 oz chocolate chips - semi sweet or 70% cacoa
1 c. heavy whipping cream


Heat cream in heavy saucepan over medium until boiling.


Measure chocolate chips into medium bowl.


Pour hot cream over chips and cover with foil. Let stand 5 minutes.


Stir until well mixed. Cover and chill for 45-60 minutes until chocolate mixture is firm but not hard.


Beat with beater until light and fluffy, about 2 minutes.


Saturday, October 20, 2012

Biscuits Supreme

These biscuits are wonderful, light, flaky biscuits that are great split with butter and honey, or as a base for biscuits and gravy, or chicken in gravy, or just about anything else you want to do with them. Since it was a chilly day today we had a crock pot of beef stew going all day and the biscuits would serve well with eggs for breakfast and then repeated with stew for dinner.

Ingredients:

2 cups sifted all purpose flour
4 tsp baking powder
1/2 tsp salt
1/2 tsp cream of tartar
2 tsp sugar
1/2 cup shortening
2/3 cup milk


Directions:

Sift the flour, then measure it and sift it again into a large mixing bowl. Sift baking powder, salt, cream of tartar and sugar into flour. I use a mesh strainer for sifting with a wire whisk and it works great. Living on a boat means using a lot of tools for multiple purposes that they weren't necessarily intended for, and the mesh strainer is one prime example.


Cut the shortening into the flour mixture with the wire whisk until it looks like coarse cornmeal.


Add the milk and stir it quickly with a fork until it comes together into a sticky ball.


Turn it out onto a floured surface and knead it just a couple times into a smooth ball. Press the ball flat and into a circle about 10 inches across and about 1/2 to 3/4 inch thick.


Cut it with a biscuit cutter if you have one, or you can use a tuna can with the bottom cut out, or as you see here, a cup with a hole cut in the bottom. Cut as many as you can from the original circle of dough, then knead it together and press it out again and cut some more until you've used all the dough.


I got six very large biscuits out of this recipe. Transfer the biscuits to a parchment lined cookie sheet. Bake at 450° for 10-15 minutes depending on your oven. I have to start mine out on the lower rack setting and halfway through move it to the top rack so the tops will brown. They should be golden brown when done.


These keep well for a day or two if you put them in an airtight ziploc, but truthfully they rarely last that long!


It's all about the small things

It's amazing how much little things can make the difference between a boat that feels like your home and one that feels like just a boat. In an effort to heat my coffee water more efficiently and therefore save some propane, I bought a small teakettle yesterday. It's a cute little 1-1/2 quart stainless steel one with a whistle, something that is also an important safety factor as it's very easy to let a coffee pot boil over and put out the flame on a propane stove which ends up pouring gas into the boat and, you guessed it,
k-a-b-o-o-m. I used it today for the first time, a cold morning, and the Little Kettle That Could heated my water post haste and then blew its little whistle. There was an unexpected side bonus, something so incredibly wonderful and comforting about that whistle that I found myself grinning from ear to ear. I know it's silly, but it works for me.  What is it for you on your boat that makes it feel like home? I'd love to hear.

Tuesday, October 16, 2012

Homemade Noodles

After a warm Winter, long Spring, Summer from hell, Fall dropped on us rather abruptly. It got cold. Fast. As a result, it was the perfect weather for our Chili / Soup Cookoff, an annual affair here at Boulder Marina, and I opted for the soup entry of chicken noodle with homemade noodles. Everyone always goes crazy over homemade noodles saying how much it makes them think of their grandma. They look on them with awe and a bit of trepidation when, in reality, they're pretty easy to make. Give it a try sometime when you have an hour or two that you want to spend thinking of your grandma and her wonderful smelling kitchen.

Ingredients:

1 cup flour
2 eggs
dash of salt (or more if you're my husband)

Directions:

Each cup of flour and 2 eggs makes enough noodles for a very healthy serving for two people. The pasta is the same whether you're making thick dumpling style noodles or thin spaghetti style ones. You just roll it to the appropriate thickness for whatever you're making.

Put the flour in a big bowl. Mix in the salt if you're using it and make a well in the  middle of the mixture. Break your eggs into the well.


Stir with a wooden spoon until the flour is incorporated and it forms a ball. At this point, use your hands to finish working in any stray flour. It should be a firm dough but not dry or too sticky either. You may have to add a little flour if it's extremely humid, but be careful not to add too much.


Cover the dough ball with plastic wrap and a towel and let it rest for at least 15 minutes. Do not skip this step!


If you skip this step, the dough will spring back when you try to roll it out and it will be a very frustrating experience. Maybe this is why so many people are afraid of making them?


If you made  more than one recipe (I made a triple batch), divide the dough into smaller balls that you can roll out. Here I had a triple recipe divided into 4 balls and it made about an 11 x 13 rectangle. I rolled it pretty thick for dumpling style noodles, but for most pasta it will be paper thin.


Once you get it rolled out you can cut the edges square if you want.


If you have one on board, a pizza cutter is the way to cut noodles. If not, use a very sharp knife and cut them. Remember that noodles double in size when you cook them so make them pretty thin for regular noodles. Mine are super thick for my dumpling style noodles.


You can lay them over a cooling rack suspended on some glasses, or we have this handy bulkhead by the nav station. You can even lay them on regular towels but it takes a little longer to dry than if you hang them in the air. You can dry them in the sun on a towel or cardboard as well. Be creative - even a clothesline will work great. If you're cooking them right away then you can put them straight into any boiling water or broth. Otherwise they need to dry completely to store. If you're cooking them right away, they only take a couple minutes to cook. For thin spaghetti pasta it's seriously only about 2 minutes. For these thick noodles I'll cook them in my chicken noodle soup for 10-15 minutes because they were dried. If you dry them well, they will keep for a few weeks at room temperature but they do pick up moisture so they need to be sealed in a ziploc and checked periodically. I find it's best only to make what you need at a time.

Sorry I don't have a picture of the finished soup - it was a busy day and I totally forgot!