Showing posts with label Desserts and Cookies. Show all posts

Saturday, December 5, 2015

The Pumpkin Pie Panic

This year has been an odd cruising year. We had hoped to make it to Stuart, FL by Thanksgiving to have our dinner with friends, but the combination of hurricane Joaquin and the passing of my husband's father set our travels back by six weeks. We did manage a good dinner at Bucksport Marina on the ICW, but it was not one I labored over with love in my galley.

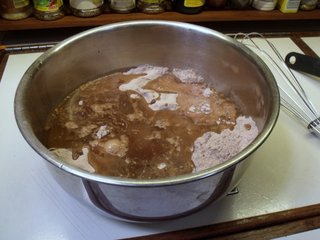
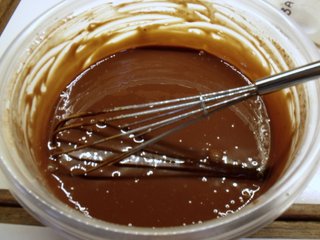
This weekend a friend of ours came to visit who had also not had a good Thanksgiving dinner, and it seemed like an appropriate time to spend the day cooking. I prepared my favorite pumpkin pie, opened the Hillerange oven door to put it in, only to discover that the mercury switch in the oven wall was in flames. I quickly turned off the oven, flipped the propane solenoid and turned off the propane at the tank. After a few minutes of discussion with my resident boat mechanic, it was determined that the mercury switch was defective and that we were, once again, without an oven. Most of the rest of the dinner could be prepared on the stove top, but the ready-to-bake pie sat there, taunting. After having learned to make pizza on the stove top last summer, I began to wonder if the pie could be baked on the stove top as well. I began to construct a stove top oven of sorts, by placing my heat diffuser on the burner. Next I placed a foil strip around the edge of the pie crust and lowered the pie pan into my cast iron skillet which I placed on the diffuser. I inverted my 10-1/2 inch heavy stainless steel deep skillet on top of the pie pan and baked the pie for about an hour on a medium low flame.

I anticipated that if it worked at all, the crust would most surely be damp and gummy. Much to my surprise, the crust was golden brown, and the pie perfectly set. The keys for the success seem to be in setting the pan on the crumpled foil around the crust which allowed the steam to escape, and in not raising the lid at all during the baking time. Our pumpkin pie panic turned into a very nice sharing of pie with neighbors over some good coffee and conversation. Score!

Fold a long piece of aluminum foil in quarters length wise and place this strip around the pie, crimping the ends together


Place a diffuser on the burner, place a cast iron skillet on the diffuser, place the prepared pie plate in the skillet (lip of pie plate should rest on edge of skillet but the bottom of the pie plate should not touch the bottom of the skillet.) Invert deep, straight-sided skillet on top of pie, resting edge of skillet on crimped foil.


Place some hot mitts (sorry mine are well-used and not pretty) on top to help hold the heat. It also helps if your top pan is a good heavy-bottomed pan.


Bake for about one hour on a medium-low flame. Do not lift lid to check. Smell periodically to check for burning - your burner temp may need to be adjusted either up or down.


 The crust browned nicely, which I think was a result of the crust being right against the top pan.

It passed the taste test!!

Saturday, November 15, 2014

The Science of the Chocolate Chip Cookie from NPR's The Salt

One of the commitments that I've made on this blog is to provide recipes that are easily adaptable to whatever ingredients you have on hand. I do this because when you're living on a boat sometimes you just don't have the exact ingredients stated in a recipe and you need to substitute. Cookies are a great way to experiment with this idea while you learn what works and what doesn't because they're pretty forgiving. I ran across an article today on The Salt blog that explained exactly what happens when you substitute ingredients. I found it incredibly helpful since I'm a visual person so go on over to the page The Science Behind Baking Your Ideal Chocolate Chip Cookie and then go ahead and make some perfect deliciousness!

The Science Behind Baking Your Ideal Chocolate Chip Cookie
See the full instructions on The Salt Blog, www.npr.org/blogs/thesalt

Wednesday, November 27, 2013

Aunt Betty's Pumpkin Bread

Disclaimer: If you are on a diet, if you are only eating healthy, or if you're an Al Gore fan and are trying to be a vegan, stop here and go to another post.

Every holiday in my family as I was growing up involved trips to my Aunt Betty's and she is, to this day, one of the best homestyle cooks I have ever known. As kids we would eat the obligatory plateful of turkey, potatoes, stuffing and green beans, but it was only so that we could be allowed the only treat we really wanted, Aunt Betty's pumpkin bread. It would plop on our plate thickly sliced and, as we grew older, with a dollop of lemon curd or a thick spread of cream cheese slathered on top. The tradition continues in my own family, where pumpkin pie almost always takes a back seat to pumpkin bread.

Thanksgiving has always been my favorite holiday, mainly because you get the benefit of family presence without the aggravation and stress of presents and the money behind them. This Thanksgiving will be one of the few that we aren't with our kids and grandkids, although it seems to be happening more often as they get older and have other families involved in their holiday celebrations, so it seemed fitting to remember the holiday with a rainy baking afternoon. I hope that this recipe will become a tradition of yours as well.

If you're not a baker, the secret to all quick breads and muffins is what is called the two bowl method. This means that you mix all of your dry ingredients in one bowl and all of your wet ingredients in another bowl. You preheat your oven and get your pans ready and then the instant that you're ready to bake you mix those two bowls together quickly, just until the dry ingredients are mixed in and aren't visible anymore then put them immediately into the oven. If you overmix the bread or muffins will come out tough, and if you let it set for awhile they will be dense.

 Aunt Betty's Pumpkin Bread

3-1/2 C flour
2 tsp baking soda
1-1/2 tsp salt
1 rounded tsp cinnamon
1 tsp nutmeg
3 C sugar
1 C chopped pecans or walnuts
4 eggs
1-1/2 C canned pumpkin
1 C vegetable oil
2/3 C water


 Place all dry ingredients in a large mixing bowl. When I make this on the boat I cut the recipe into 3/4 or it won't fit in either my bowl or my oven. A  half recipe will make two small 8 x 4 loaves, a full recipe will make three 9 x 5 loaves or four 8 x 4 loaves. I also sometimes make these in 13oz coffee cans which for some reason leaves the bread without a hard crust and makes nice loaves to wrap and give away. A full recipe will make 3 of those cans. Be sure to wash well and grease well and remove any plastic film labeling.


 Mix all the wet ingredients in another bowl with a whisk. Sorry for the blurry picture here but we're having a bit of bad weather and it's hard to keep the camera still when the boat is rocking all over the place.


Prepare your pans. When I'm using foil pans or regular bread pans I spray them with non-stick spray and then line the with waxed paper and spray lightly again. If I'm using the coffee cans I spray them well and dust them lightly with flour.

Preheat your oven to 350°


 When the oven is preheated, mix the wet ingredients into the dry ingredients and stir quickly with a wooden spoon, just till the dry ingredients are no longer visible.


Divide the batter evenly among your pans and put them in the oven.  Bake them until a toothpick inserted comes out clean. This can vary wildly depending on the pans you used and your oven. If you use dark pans it will take less time and you may have to lower the oven temp just a little. If you use aluminum pans it will take longer, as will the coffee cans. It will take somewhere between 45 and 60 minutes.


Cool the loaves on a wire rack until just barely warm to the touch  and then turn them out and peel off the waxed paper. Resist the temptation to turn them out early as they will crack. These can be frozen and will actually taste better after being frozen, so I often bake a half dozen or more loaves and keep them in the freezer for gift giving at Christmas. Enjoy!


Thursday, November 14, 2013

Apple Pie Tart

This tart gives you the flavor of apple pie and the aroma of cinnamon wafting around your boat with slightly less effort. It's a pretty impressive dessert for guests, and it also makes an excellent breakfast treat with coffee.  I used the apples that I bought at the Oriental Farmer's Market here in Oriental, NC, a mixture of three different kinds, all tart. You can peel the apples if you want, but I left the peel on for a bit more flavor.

For crust:

1-1/3 cups sifted flour
1/2 cup butter flavor shortening or unsalted butter
1 tsp salt
1/4 cup ice water

Sift flour, measure, and sift again into large bowl along with salt. Add shortening or butter and cut it in with a pastry cutter or using 2 knives until the mixture is coarse. Add ice water and stir quickly with a fork until the mixture comes together into a ball and cleans the side of the bowl.  Roll out to a circle about 13" round. Roll loosely around rolling pin and transfer to cookie sheet lined with foil and then lined with parchment.  Set aside.


For filling:

2 large apples, any tart variety
2 Tbl lemon juice, fresh if available
1/2 cup sugar
2 tsp cinnamon
2 Tbl butter
1/2 cup chopped walnuts.


Wash apples and quarter. Cut seeds out and slice cross-ways very thinly into bowl. Add lemon juice, sugar, and cinnamon. Toss together until well mixed.


Place apple mixture on center of crust, leaving about 2 to 3 inches around filling. Sprinkle with chopped nuts. Melt butter and pour over the filling. Fold crust partially over filling, leaving a circle  exposed in the middle about 3 inches.

Bake at 375° for 35-45 minutes, or until the crust is golden brown and the apples are tender when poked with a sharp knife. Let cool for 10 minutes.


For frosting:

While the tart is cooling, mix 1 cup powdered sugar with just enough milk to make it drizzle from a fork, adding a teaspoon at a time. The mixture should be thick but still able to run from the fork smoothly.
Drizzle the icing across the tart in decorative lines and serve either warm, or let cool completely. If serving as a dessert you can add a scoop of ice cream.


Friday, October 25, 2013

Dema's Ginger Cookies

Yes, we're finally cruising so the cooking hiatus is over. Were in a big push to get south before the cold weather gets unbearable, but I'm finding time to do a little cooking here and there on the way. As promised on our site The Retirement Project, here are the famous ginger cookies which make such good cruising companions, especially when the weather is rough.

Ingredients:

3/4 C butter
1/2 C brown sugar, packed
1/2 C white sugar
4 tsp molasses
1 egg
2 C sifted all purpose flour
2 tsp baking soda
1 very rounded tsp cinnamon
1-1/2 tsp ginger rounded
1/2 tsp cloves
1/4 tsp salt
1/3 C. cinnamon sugar

Directions:

Mix softened butter, sugars, molasses and egg together well till creamy and light. Add dry ingredients and mix well. If the dough is too dry, add a tablespoon or two of water, one at a time.

Tip: If you are making these on a boat and you only have cold or frozen butter, you can grate the butter into your bowl and it will mix in easily.

Tip: If you hate sifting flour you can use unsifted, but reduce the amount by 2 Tbl. 


Roll into balls and dip the top into cinnamon sugar. 


Place sugar side up on cookie sheet and bake 375° for 11-12 minutes. 

Cookies will flatten and start to crackle on top. Cool and store in airtight bag.


Saturday, December 22, 2012

Crisp Christmas Sugar Cookies

...otherwise known as Calm Water Cookies, only because I have serious doubts about making them in any sort of rolly anchorage. I actually had my doubts about making them on the boat at all because every year when we make these my kitchen looks like the Pillsbury Dough Boy exploded. But I decided to try anyway because this year I was only going to make 2 kinds of regular cookies for my husband since I had busied myself the whole baking season with making allergy diet legal cookies for my 2 grandsons who are suffering due to food allergies. These are my husband's favorites, and this was the only time I had to make them, so onward I went. It turns out that when the cookie making doesn't involve people under the age of 10, it's a lot cleaner. Who knew?

This cookie is a very delicate, crisp sugar cookie that has a wonderful texture and a very mild flavor when not iced. You can brush the dough with milk and sprinkle colored sugar crystals on top after you cut them out and put them on the baking sheet but before baking. You can also ice them with the icing below which hardens into a sugar coating. I much prefer them plain, but everyone has different tastes. When iced they are impressive as a gift or for that office party <cringe>. They are also excellent with a corner or half dipped in melted chocolate and then finely ground walnuts sprinkled into the chocolate before cooling. The real shame of it is that I seldom make these except for the holidays, yet they make a wonderful every-day cookie.

Ingredients:


1-1/2 cups powdered sugar
1 cup butter, softened
1 egg
1 tsp vanilla
2-1/2 flour
1 tsp soda
1 tsp cream of tartar

Directions:


Beat the butter in a bowl till creamy.  Add the powdered sugar a half cup at a time, mixing well in between. Add the egg and vanlla and mix well. (Sorry I don't have a picture of this step. I was distracted by something and totally forgot) Mix the flour, soda and cream of tartar together and add to the wet ingredients. Blend till incorporated but do not overmix.


If you don't have cream of tartar, don't attempt to make the cookies. I thought once, "what difference can 1 teaspoon of cream of tartar possibly make?" and promptly found out. The cookies were heavy and tasted profoundly different.


Place the dough in a ziploc or plastic container and chill at least an hour. Divide dough into quarters. While rolling out one quarter, keep the remaining 3 in the ziploc so it doesn't dry out.


Roll the dough out fairly thin, about 1/8", on a lightly floured surface. I cover my table with waxed paper or freezer paper or parchment. If you roll them thin, they take less time to bake and will be crisper. If you roll them thicker, allow a minute or two longer in the oven. They will be softer after being baked.

Cut with cookie cutters that you have dipped in flour. Gently transfer the dough to a cookie sheet lined with parchment. Either an air bake or parchment lined pan will work, but these will stick on most anything else. Bake at 375° for 6-9 minutes depending on the thickness you rolled the dough, the temp of your oven, and the color of your cookie sheet. Watch them carefully as they burn quickly. Once you've done one batch you'll know what to set the timer for next. If you use parchment, you can have the next batch ready to go by the time the first one is out. Slide the parchment off the hot pan and slide the next one on. These means no dirty pans and a quicker transfer. One word of caution, though. If you put cookies on a hot pan you will need to reduce the time you bake them. After removing the parchment to a cooling rack, allow them to cool completely then ice with cookie icing.


Cookie Icing

2 cups powdered sugar, sifted
1 Tbl honey
2-3 Tbl milk
1 tsp vanilla


(Sorry about the blurry picture!)
Sift the powdered sugar to remove any lumps. Put 2 cups in a bowl and ad the honey, vanilla, and 2 Tbl milk. Add as much more milk as necessary to get a slightly thick mixture that you can still stream from a fork. Remove a small amount into two small bowls and color one red and the other green. You will need to use the gel style colorant in order to get it dark enough without thinning it out too much. Ice the cookies one at a time with the white base and then drizzle the color from a knife or fork onto the cookie. Be creative. You can make some awesome designs by pulling a toothpick across the color after you drizzle it on. Allow the cookies to dry completely and the icing is hard to the touch. Store in an airtight bag or box. These freeze very well.


Saturday, November 3, 2012

3-Hole Chocolate Cake and Chocolate Ganache Frosting

This cake is an old old family recipe and is absolutely my favorite chocolate cake on this earth. It's simple to make, bakes well, is moist and chocolaty and has a good crumb. It tastes great just by itself, dusted with powder sugar, or frosted. It keeps well (although rarely lasts long), freezes and thaws well, and I promise will become your favorite one too.

Today I was making it for a Halloween party at our marina, so I decided to make mini cupcakes instead. I also decided to use a chocolate ganache for the frosting, one that I have become very fond of, a recipe from Cooks Illustrated. The chocolate ganache has only 2 ingredients - heavy cream and dark chocolate - and it tastes like a piece of heaven.  I hope you enjoy them both as much as I!

Make the ganache before you make the cupcakes so that it has time to chill while the cupcakes bake. This recipe is a half recipe and makes 48 mini cupcakes. If you are making a 9 x 13 or jelly roll sheet cake you can double it. Adjust your baking time accordingly.

3-Hole Chocolate Cake

Ingredients:

1-1/2 c. flour
1 c. sugar
1 tsp soda
1/4 tsp salt
3 Tbl cocoa
6 Tbl oil
2 tsp vanilla
1 tsp vinegar
1 c. water

Directions:

Sift the flour, sugar, soda, salt, and cocoa into a large mixing bowl.


Make 3 wells in the dry ingredients. Put the oil in one, the vanilla in one, and the vinegar in one.


Pour water over it all.


Mix well but briefly. The batter will be thinner than cake mix batter.


Line mini muffin tins with paper liners and fill 3/4 full with batter.


Bake at 350° for 13-15 minutes or until toothpick inserted in center comes out clean. Remove from pan immediately and cool on rack. Frost if desired.


Chocolate Ganache

Ingredients:

8 oz chocolate chips - semi sweet or 70% cacoa
1 c. heavy whipping cream


Heat cream in heavy saucepan over medium until boiling.


Measure chocolate chips into medium bowl.


Pour hot cream over chips and cover with foil. Let stand 5 minutes.


Stir until well mixed. Cover and chill for 45-60 minutes until chocolate mixture is firm but not hard.


Beat with beater until light and fluffy, about 2 minutes.