Thursday, July 28, 2016

Gluten Free Rice Flour Tortillas

As I've mentioned before on the blog, my grandkids have major food allergies. They were coming to visit us on the boat and I had to come up with some new recipes for them. One of them is allergic to wheat, the other to all forms of dairy, both of them have sensitivities to corn and potatoes. All of the starches and the xanthum gum used in typical gluten free flour mixes cause them problems. The only completely safe flour for them at the moment is rice. Trying to find a 100% rice flour tortilla recipe was daunting. I began to experiment with a few and ended up combining a couple of them to end up with this successful one. Most of the ones I tried left me with a sort of tostada crunchy tortilla, one that would not roll up or fold without cracking. This modified recipe leaves you with a soft, rollable tortilla with great flavor and consistency. 
Rice flour tortillas must be made pretty soon before eating and they don't really keep very well, so plan accordingly. Do not use white rice or sweet rice flour for these tortillas. Only brown rice flour will work. I apologize for the lack of step-by-step photos in this post, but I had three small children "helping" me so it limited my picture taking!
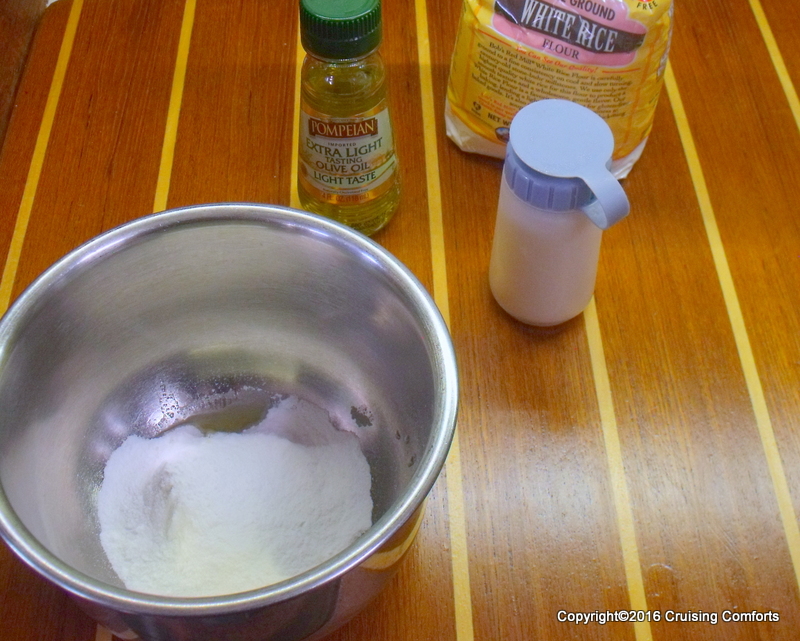
Ingredients:

2 c water
1 tsp salt
1-2 tsp olive oil
2 c brown rice flour

Directions:

Heat the water, salt, and oil in a small saucepan until not quite boiling. Add the flour all at once and stir vigorously with a heavy wooden spoon. The mixture will form into a stiff dough quickly and will make a ball. If it doesn't, add a bit more flour and continue to mix until a ball is formed.

Cover the ball with plastic wrap and let it stand for 10 minutes.

Knead the dough until it's smooth and consistent in texture.

Break off a plum-sized ball and roll it between sheets of parchment until it's very thin. You will need to remove the parchment, replace it loosely, flip, remove the parchment on the other side, replace it loosely, then roll again. Do this several times during the course of the rolling to prevent the dough from shrinking the paper into wrinkles.

When the dough is thin, peel one side of the paper off and flip the paper over, transferring the tortilla to a medium hot griddle or iron skillet. Peel the paper off the top and allow the tortilla to cook until bubbles form on the surface and small golden areas appear on the underside. Flip and cook until the other side is the same.


Transfer the tortilla to a plate lined with parchment. Place another parchment square on top of the tortilla and invert another plate on top. Continue to stack the tortillas between squares of parchment under the plate. The two plates will trap the moisture and the tortillas will absorb the moisture back into them, giving you soft tortillas. 


Note: There is one exception to using white rice flour. If you need a sticky tortilla to roll for chimi changas, then use sweet rice flour. The tortillas are very much harder to roll and to transfer, but they stick well to themselves with a brush of water and stretch a bit easier to contain the fillings before you fry them. The brown rice flour tortillas work best for hand held burritos and tacos, but for anything fried, they cracked when rolled tight enough. The chimi changas with the white rice flour were delicious!

Thursday, July 7, 2016

Gluten Free Rice Flour Tortilla Chips

My grandchildren have inherited my generation's unfortunate desecration of the food supply in the form of multiple food allergies. Three of my nine grandchildren are coming to visit next week, so the sailing vessel Kintala's allergy-free test kitchen is in full testing mode today for new recipes. I actually came up with this recipe as a result of trying to make some form of rice tortilla or wrap. My original attempt didn't result in anything appealing so, in an effort to salvage what I had made, I decided to convert them to tortilla chips to use for scooping hummus. They were a grand success. If you happen to have a gluten free issue, please try these. They are super quick and easy to unbelievably inexpensive, and are much more delicious than any I've bought in the store.


Measure 1/4 C white rice flour into a small bowl. Organic rice flour is best, but I didn't have any at the moment so I used regular. Add 1/4 tsp of olive oil and 1/8 or less tsp of salt to the rice flour and stir.
Add a little water at a time while stirring with a wooden spoon until a ball forms and cleans the sides of the bowl. It should look and feel like play dough - soft but not sticky. If you add too much water, don't worry - just add a bit more rice flour until the consistency is correct.
Divide the dough into two balls.
Sprinkle a bit of rice flour onto a square of waxed paper or parchment paper. Press the ball out into a circle with your fingers.
Sprinkle a bit more rice flour onto the dough and top with another piece of waxed paper. Roll the dough with a very light touch on the roller. Stop periodically and remove the paper, add a bit more rice flour, replace the paper, flip, and repeat. Do this until the circle is about 9" across and as thin as you want your chips. Thinner yields lighter chips, thicker yields crunchier chips. Just remember that the thinner the dough, the harder to transfer it to the pan.


Remove the top paper and, using the bottom paper, flip onto a medium hot griddle. Remove the paper that you used to transfer it. Cook until small bubbles appear, flip, and cook again until the dough is set and the edges start to lift. It will not get browned so don't over cook it.
While the tortilla is cooking, heat a couple cups of oil in a small pan to between 350° and 360°. It doesn't take much oil. If you are making the cinnamon sugar version of these, I think you could use coconut oil but I haven't tried it. I use our infrared thermometer for this and it works well.


Cut the tortilla into 6 wedges with a knife or pizza cutter.
Place 3-4 of the wedges into the hot oil. They will immediately puff up and float to the surface. Cook them for about a minute (depends on your oil temp) until the bottom starts to get golden, then flip them with a slotted spoon.


Cook them another minute or less until the second side is golden.
Remove them to a cooling rack or cookie sheet lined with paper towels to drain.
Immediately salt them while still warm. You can use a fine regular salt, garlic salt, cinnamon sugar, or any other seasoning. The finer the consistency of the seasoning, the better it will stick. Cool them completely. I'm not sure about storing them. I will update later. At this point, I think it's best to make small batches that you will use right away. One of these recipes makes 12 chips. What you see here is two recipes' worth.

These are super crispy and excellent for scooping hummus.


Enjoy!

Friday, July 1, 2016

Easiest Way to Cut a Pineapple

Here's a little video to help you with your holiday weekend picnic preparations. Have a great weekend!