Showing posts with label Main Dishes. Show all posts

Thursday, March 26, 2015

In search of the perfect cheeseburger

Note: Edited to add a couple things I forgot.

The perfect cheeseburger has always eluded me. This is particularly frustrating because cheeseburgers happen to be one of my husband's favorite foods. I've tried the grill thing, both charcoal and gas, and always seemed to end up with burned on the outside and dry, dry, dry on the inside. Tried cooking them less, and ended up with red on the inside, which is a no-no for me. Just can't do the rare thing. After years of trying, I had pretty much given up and left the cheeseburger eating to those rare nights when we ate out.

Fast forward to our cruising days. That would be our budget cruising days, the ones that include even much rarer eating out, and cheeseburgers were being missed. One day I spent a few hours on the settee determinedly perusing the internet in search of the perfect cheeseburger recipe that would yield the heretofore unrealized juicy, fragrant, flavorful culinary delight of beef, cheese, and bun. After reading a dozen sets of instructions, I pooled the  most sensible of the ideas, got out my meat and gave it a try. To say that my husband was pleased would be an understatement. It was, in fact, something akin to an orgasm, I believe. So perfect were the results, that we now have cheeseburgers almost once a week. So it is with great fanfare that I present to you, The Perfect Cheeseburger.

Before you even start, know that this recipe takes time. Do not rush it, because if you do, you will not get the results you are looking for. Here are the steps.

1. Start with ground chuck in the 80/20 meat to fat ratio. If you use lean ground beef you will not end up with a juicy hamburger. Don't compromise on this step.

2. Break the meat up into chunks with two forks. You can do this right in the store foam tray.


3. Season the beef very well. I use salt, pepper, garlic salt, and just a touch of barbecue seasoning. Do not be shy about the seasoning, especially the salt. You will find you need more than you usually think you do. Just sprinkle the seasoning on the top of the chunks but do not stir it in.

4. Walk away. Far away. L et the meat stand 30-45 minutes or longer with the seasoning on it and don't touch it, no matter how tempted you are.


5. Preheat your skillet over medium high heat while you form the patties. Don't grill them. Use a skillet. Juicy, flavorful hamburgers depend on frying in their own fat to absorb the moisture and flavor. If you're on a diet, skip this post.

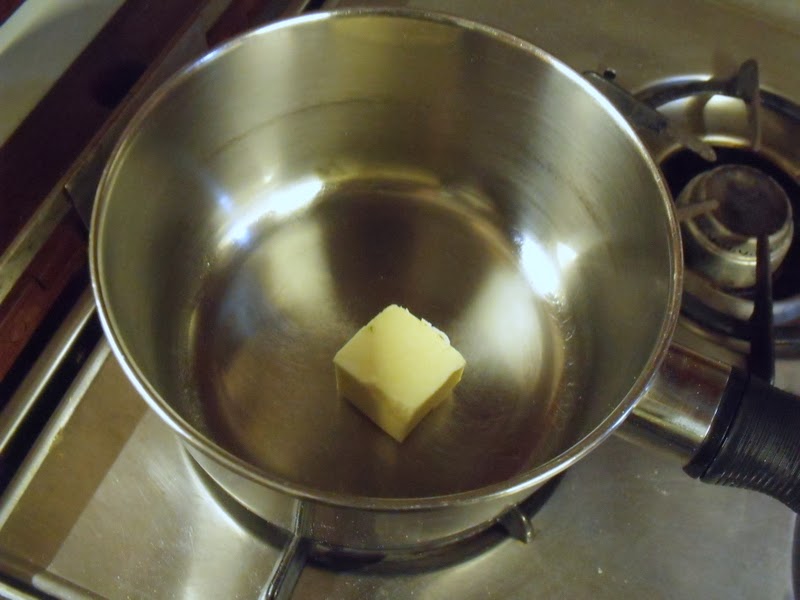
6. Gently form the meat into patties being careful not to overwork it. It should just barely be held together. Poke five or six holes in the patty with your finger, then place in the preheated skillet. Put the patty where you want it because you cannot move it once you set it in the pan.


7. Reduce the heat to medium low and allow the patties to cook until the edges begin to turn brown but the top is still pink.

8. Turn the patties over gently. Reduce the heat to low and cover the pan. Let the patties cook for a few minutes until the juice running out is clear.

9. Slap some cheese on those babies, cover the pan, and then turn the heat off. Continue preparing your side dishes while the burgers sit.

10. By the time your side dishes are done, the burgers will be too. If your cheese is very soft you may want to wait to put it on the burgers until the last minute.


Experiment with seasonings and your stove temperature. It may take a few tries to get it exactly the way you like it, but believe me when I say it is worth the effort!

Thursday, February 12, 2015

Versatile Flour Tortillas

We eat a lot of Mexican on the boat. It's tasty, it's easy, and the ingredients are easy to store. A good many of our recipes use flour tortillas. If you've never made them yourself, you may not want to - they are so good that you will have a very difficult time going back to store bought after that, so be prepared to make a lot of tortillas! Just remember that these tortillas don't have the preservatives in them that the store bought ones do that make them last an unnaturally long time without molding. Make small enough batches that you can use them in a day or two, or store them in the fridge for about a week max. A note on ingredients: I have not tried these with whole wheat flour yet, but if you do you will need to cut it about 1/2 and 1/2 with white flour and you may need substantially more liquid. You can also cook some spinach and use the drained, pressed-out water for the water in these. Use your imagination. On the shortening, lard or butter - I personally abhor shortening. The Mexicans use lard exclusively for their tortillas and I find it makes a better one.

 
Ingredients:

2-1/2 cups of white flour
1 Tbl shortening or lard or butter.
1 tsp. of baking powder
1/4 tsp salt
3/4-1 cup boiling water


Directions:


Mix the flour, baking powder and salt together. Cut in the shortening until it resembles very fine cornmeal.


Add 1/2 cup of the boiling water and then begin to mix it with a fork. Add the remaining water a very little at a time and continue mixing until the dough pulls away from the sides of the pan. You may not need all the water. The dough should be soft but not sticky at all.


Knead the dough on a lightly floured surface until it's smooth and elastic, usually just a few minutes.


Oil the surface of the dough and put it back in the bowl and let it rest, covered, for 10 minutes.


Break off golf ball sized hunks of dough and roll them into balls. Keep the balls covered while you work the tortillas so the dough doesn't dry out.  Roll a ball out with a rolling pin until it's very thin but you can still handle it without tearing it.


Preheat a cast iron skillet to medium high and lower the tortilla into the pan carefully so you don't fold it over on itself. Cook it until bubbles start to form.


Flip it and continue to cook it until it has brown spots on the bottom. Move the tortillas to a plate and cover with another plate. The moisture from the warm tortilla will help to soften it. Continue to stack the warm tortillas, but rearrange them periodically so they become evenly moist and soft. If you are making tacos, you can begin to fry the tortillas in oil right away . Use tongs to hold the taco shape as you fry them.Serve warm or cool completely and store in a plastic bag with a paper towel inside the bag to absorb excess moisture.

Thursday, January 29, 2015

Macaroni and Cheese

The ultimate comfort food - warm, cheesy mac and cheese. This recipe is one I've made since time immortal and after having a bunch of people asking for the recipe I decided I'd better get it on here. I do have a disclaimer, though. I've never had a written recipe for this, always making it up as I go along and using whatever I had on hand. It is also one of the most versatile recipes I have and, since the ingredients can vary so widely, it tastes a bit different every time I make it. I usually make this recipe when I have a bunch of cheese bits and pieces in the fridge. The more types of cheese, the better it is. You should use a mixture of at least 3-4 cheeses and you should incorporate some parmesan and at least some soft cheese like American or even some cream cheese or goat cheese or feta. Cheddar should be as sharp as possible to add flavor. You can even add some sour cream for part of the milk to add a tang. In all likelihood it will take you several attempts to perfect your version, so be patient!

Ingredients:

2-1/2 cups dry elbow macaroni
4 cups cold water
5 Tbl butter
1 medium onion, chopped
2 tsp minced garlic
1/8 tsp black pepper
4 tsp garlic salt blend
1/4 tsp smoked paprika
pinch cayenne
1/3 cup flour approximately
3 cups milk
4 cups grated cheese: see notes about cheese above

Directions:


Place the dry macaroni in a medium saucepan.


Pour the cold water over the macaroni. Heat to boiling and then reduce the heat to a steady boil.


Continue to cook for 5-8 minutes, stirring frequently, until the macaroni is just barely tender and the water is absorbed. Cover it, remove from the heat and set aside.


In another pot or deep skillet melt the butter. Add the chopped onion, garlic, pepper, garlic salt, paprika and cayenne. Cook on medium heat, stirring frequently, until the onion is translucent and the spices are fragrant.


Add enough flour to make a thick paste. It will vary depending on the humidity and the type of butter but it should be about the consistency of mashed potatoes. Stir and cook for 1 minute.


While stirring with a wire whisk, add the milk about 1/2 cup at  time, whisking well in between. It will start out lumpy but will turn creamy as you continue to add the milk.


Add 2-1/2 cups of the cheese and stir till melted. The sauce should be fairly thin if you want to bake the mac and cheese, and thicker if you want to eat it creamy from the stove top. You may have to add 1/2 to 1 cup milk extra if you want to bake it so it doesn't turn out dry.Add sauce to macaroni.


Stir well till combined.  At this point you can eat it as creamy stove top macaroni, or you can place in a greased 9 x 13 pan.


Top it with the remaining cheese and bake at 375° for 30-45 minutes or until the edges are crispy and golden and the cheese is bubbly throughout. You can make it up to a day ahead and bake it right before serving, but if you do this you will need to bake it for an hour or more due to the cold starting temps. You can also bake it at a higher temperature. This dish tolerates a wide range of temps from 350° up to 425°.
I have to apologize, but we had guests and I completely forgot to take a picture of the finished product again. Here's a picture of a demolished pan from a previous dinner - you get the picture, it doesn't last very long around here!


Thursday, July 17, 2014

No-oven skillet pizza

Edited 11-24-14: I have worked on this recipe some more because we use it constantly. Here are some improvements. If you like thicker crust pizza then you need to turn down the heat a bit. I have also been pressing out the dough on a piece of parchment paper and transferring the whole parchment paper onto the skillet. This keeps the bottom from getting too dark. When I do the flip, I remove the paper. Enjoy!
 
Before you discount this recipe just based on the title and what your personal pizza prejudices are, I dare you to try it. Honestly, I may never make pizza in the oven again. This was that good.  I started out by Googling "stove top pizza" because my galley oven is broken and we have yet to find the pieces to fix it. I ended up on the Pizza Lab's site and starting out with his idea I began to modify things for my own taste. Give it a shot and I promise you won't be disappointed!

Ingredients:

Pizza Dough Recipe: The recipe at this link is for 3 pretty large pizzas in the 14" range, depending on how thin you make it. I made 3/4 of this recipe and divided the raised dough in 4 balls and made 4 pizzas the size of the bottom of my cast iron skillet. It's really important to start out with a good dough recipe and this is the best one I've ever used.

Pizza sauce, small jar
Mozzarella or pizza 4-cheese mix grated, 8 oz
Pepperoni or whatever other toppings you like.


Directions:

Make the dough per the recipe. After it rises, divide it into 4 or 5 balls and set them aside. You need the heaviest skillet you have and I have found that cast iron works the best. Heat the skillet to 500°. This is very important. Check it with a digital thermometer - the laser type that we keep on the boat to check the engine temp is what I use. If the temp isn't evenly 500° over the skillet bottom, turn the pan until it's fairly even. The way that my burners are set up on my galley stove, the skillet can't quite get over the middle of the flame without bumping into the rails around the stove top so I have to turn mine frequently. When the skillet is almost ready, press one of the balls into a circle a little larger than the bottom of your skillet. The dough will shrink back as soon as it settles in the pan so you need to make it slightly larger than that diameter.

While you are waiting for the skillet to heat, heat up your sauce and toppings. If you're using veggies, saute them and keep them warm. If you're using pepperoni, toss it in a small skillet and heat it up till it just starts to crisp. Keep the toppings warm.


Once the skillet is hot, place it on a heat diffuser. Oil the skillet with olive oil and gently lower the circle of dough onto the skillet. Turn the skillet periodically to even the heat. Check the bottom of the crust with a spatula. It should take several minutes for the crust to  become golden brown and for bubbles to appear in the dough on the top.


Brush the top with olive oil and flip it over. Cook it for a few minutes until the places touching the skillet become golden brown and the remainder is no longer doughy.


Flip it back over, spread with your sauce, cheese, and toppings. Immediately turn the burner down to low and cover the skillet with foil or a lid that has a vent hole in it.


Let it cook a few more minutes until the cheese melts and the bottom is crispy but not burned. This recipe makes fantastic crispy crust, chewy inside pizza that is as good as any pizza shop!


Sunday, June 1, 2014

Rice Balls

As you may have gathered from previous posts, some of my grandchildren have some pretty severe food allergies, the primary ones of which are wheat and dairy. Since they are living with us on the boat for a few weeks while they prep their boat for their new life as full-time liveaboards, I've been back to cooking primarily gluten free. This means a lot of rice and, while I happen to love rice, eating it with nearly every meal I was beginning to tire of it. A little creative thought and we have found their new favorite recipe. Like most of the recipes I post here for galley preparation, this one is highly adaptable, and is even more fantastic if you happen to be one of the lucky ones who can have dairy and wheat. It's a bit reminiscent of the ubiquitous Tater Tots. The recipe uses cold, leftover rice and you can turn these balls into a savory side dish by adding Italian spices and parmesan cheese, or you can make wonderful cinnamon raisin ones similar to donut holes which we had this morning and didn't last very long. Use your imagination!


Ingredients:

2-3 cups of cold, leftover rice
1 cup fresh bread crumbs (you can use gluten free crumbs if you have allergies)
2 tsp Italian seasoning
2 eggs
1/2 tsp salt
1/4 tsp pepper
1/2 cup parmesan cheese (optional if you have a dairy issue)

Directions:

Mix everything in a bowl well. Wet your hands and roll large tablespoons of the mixture into balls the size of golf balls and put them on a cookie sheet.  In a large, straight sided skillet, heat several cups of oil (1/2" or 3/4" depth) to 375°. Gently place half of the balls into the skillet. Turn frequently while cooking so they cook evenly. Cook them until they are deep golden brown. Drain on a paper towel lined plate and repeat with other half.

If you want to make the donut version, use the following:

2-3 cups cold, cooked rice
2 eggs
1 cup fresh bread crumbs
1-1/2 tsp cinnamon
1/2 cup raisins


This recipe was an experiment that ended up turning out incredibly delicious and I wanted to share it with you. I hadn't done very many process pictures before I realized it was turning out this well, so the pics are pretty limited.  It's a pretty simple recipe, though, so give it a try!

Sweet and Smokey Spice Mix

I've been playing around with spice mixes lately. There's a group of McCormick spice blends that I really like, but I can only seem to find them at Walmart and I can't get there very often so while we were in the Bahamas I decided to try my hand at mixing something close and was pretty happy with the result. So enjoy, and please if you have some additions or suggestions feel free to comment.

Sweet and Smokey Barbecue Spice Mix

1Tbl Garlic Powder
2 Tbl Chili Power
1 Tbl Onion Powder
1 Tbl Salt
1 Tbl Smoked Paprika
1 Tbl Cracked Pepper
3-4 Tbl packed brown sugar
1 Tsp Cinnamon

Mix the spices well in a bowl and sprinkle heavily on pork chops  before pan frying.  I really intended to have a picture of the finished product, but I had some very hungry toddlers underfoot and somehow it completely escaped my attention. This picture of the chops in progress will have to do. Enjoy!


Saturday, November 30, 2013

Braided Tuna Loaf

It's always a good thing to have a can of tuna in the pantry on a boat, just in case you don't have any meat hanging out in the fridge waiting to be used. I'm not a huge fan of tuna, probably a result of excessive amounts of tuna noodle casserole served at the dinner table when I was growing up. That being said, this recipe is one of the few that I really like and graced our family table when my kids were growing up. The sauce is one that will merit a separate blog entry when I get some time but for now it will do here.

Braided Tuna Loaf

1 Recipe of Cheddar Drop Biscuits on the sidebar, using only 2/3 cup milk and no cheese.
1 can of chunk white tuna
2 Tbl minced onion
1 beaten egg, divided
salt and pepper to taste
1/2 c shredded cheddar


Begin by making the recipe of biscuits on the sidebar, using only 2/3 cup of milk and no cheese in the dough. Roll the dough out on a floured surface until it's about 10" x 14". Mix tuna, onion, 1/2 of beaten egg, salt and pepper and cheese. Spread evenly down the middle third of dough. Using a sharp knife, make cuts through the dough from the outside edge just to the filling at an angle, making 6 or 8 slanted strips.


Fold the strips over alternately to make a braided top. Mix remaining egg with a little water and brush over the top. Bake at 400° for 20-35 minutes or until golden brown. While it is baking, make the cheese sauce.


No Measure Cheese Sauce

This cheese sauce is a variation of a standard white sauce, which is also wonderful to use for so many other things like potato soup, cream of mushroom soup, sausage gravy, or macaroni and cheese. It's one to master for sure!


Melt a hunk of butter in a saucepan on medium. The size of the butter chunk will determine the quantity of sauce you end up with. 4 Tablespoons will yield about 1-1/2 cups of sauce.


Add enough flour to make a very thick paste, and stir until the butter separates from the pan and kind of chunks up.


Add milk a little at a time, stirring hard with a wire whisk in between. The first addition should leave it looking a bit like mashed potatoes.


The second addition should leave it looking a bit like frosting.


The third addition it will be thick white sauce. If you're making it for a recipe that needs thinner sauce then just add a little more milk and whisk.


Add at least a cup of grated cheese. Use your imagination, and all the leftover chunks of cheese in your fridge. The more the merrier. You can use swiss, cheddar, american, cream, havarti, parmesan, just mix them all together in there. Add salt and pepper to taste.


Serve the braid in thick slices with the cheese sauce over top. A side of brocolli is great with this.

Thursday, November 14, 2013

Orange Chicken

This is one of our favorite recipes. The flavor is rich and spicy and the mixture of textures and flavors are a treat for your taste buds. The original recipe is from cooksillustrated.com which is still the best cooking site out there in my opinion. It does cost a few pennies to subscribe to the site for a year, but the recipes all include a "why this works" section, and detailed step-by-step instructions for fail-safe success. I also like this recipe because if you're having guests, as we were last night, you can prepare everything and keep it warm for a few minutes while you clean up. This is pretty important on a boat so I look for recipes that allow me to do that. There is the disadvantage of the deep frying smell in the boat, but for the taste of this recipe I'll put up with that!

Orange Chicken

Ingredients
1.5 lb boneless, skinless chicken thighs
3/4 cup low sodium chicken broth
3/4 cup orange juice (2 medium oranges)
1.5 tsp grated orange zest (from one orange)
8 strips of orange peel 2" x 1/2" from 2 oranges
6 Tbs white vinegar
1/4 cup soy sauce
1/2 cup brown sugar
3 minced garlic cloves (1 Tbl)
1 inch piece grated ginger (about 1 Tbl)
1/4 tsp cayenne pepper
1 Tbs cornstarch plus 2 tsp
2 Tbs cold water
8 small whole dried red chilis (optional)
3 egg whites
1 cup cornstarch
1/4 tsp cayenne pepper
1/2 tsp baking soda
3 cups peanut oil

Directions

Trim the fat from the chicken, cut it into bite-sized pieces and place in a ziploc bag.


Combine the chicken broth, orange juice, grated zest, vinegar, soy sauce, sugar, garlic, ginger, and cayenne in a sauce pan. Whisk until the sugar is fully dissolved. Measure out 3/4 cup and pour into the Ziploc with chicken; press out as much air as possible and seal the bag, making sure that all pieces are coated with marinade. Refrigerate 30 to 60 minutes, but no longer.

Bring the remaining mixture in the saucepan to a boil over high heat.  In a small bowl, stir together the cornstarch with the cold water; whisk cornstarch mixture into sauce, stirring constantly.  simmer  sauce, stirring occasionally, until thick and translucent, about 1 minute. Off heat, stir in the orange peels and chilis. the sauce should equal 1-1/2 cups. Set aside.

Whisk egg whites in a pie plate until frothy. In a second pie plate, whisk together baking soda, cornstarch and cayenne pepper until well combined. Drain marinated chicken in colander or large mesh strainer; thoroughly pat chicken dry with paper towels. Place half of chicken pieces in the egg whites and turn to coat; transfer pieces to the cornstarch mixture and coat thoroughly.


Place dredged chicken pieces on wire rack set over baking sheet; repeat with other half.  Let chicken dry.

Heat oil in deep, heavy pan to 350°.  Carefully fry chicken pieces in small batches until golden brown (about 5 minutes). Place on large plate covered with paper towels and keep warm in the oven.


When ready to serve, reheat sauce over medium heat until simmering, about 2 minutes. Add chicken and gently toss until evenly coated with sauce. Serve immediately over rice with a side of steamed broccoli.