Showing posts with label Snacks Chips and Appetizers. Show all posts

Friday, March 29, 2019

Tasty Microwave Popcorn Popper - A Product Review

One of the gripes I have with microwave popcorn is that even with the fat-free or light versions, it's more calories and popcorn than I want to eat by myself and I don't always have someone to share it with. While shopping at Walmart the other day (she cringes because she hates Walmart but needed a fast place to get a lot of things,) I happened on this very cool snack-size microwave popcorn popper. It was only $8 and change so I decided to spring for it on the chance that it might work.

The popper has a maximum capacity of 1.5 quarts. The directions say to fill the silicone floppy lid to the line with kernels, then dump them into the popper, but I only wanted a 60-calorie snack. I had regular Orville Redenbacher popcorn kernels in the cupboard and the nutrition info for it says that 3 Tbl of unpopped kernels is 120 calories. So I took 1-1/2 Tbl of kernels, put them in the popper, put the lid on and stuck it in the microwave. No oil, no butter, nothing but popcorn. I set the microwave on the popcorn setting (our microwave is 1100 watts) and watched and listened. It took almost 2 minutes for it to slow to the recommended 2 second between pops. It would take longer with a smaller microwave. The popcorn was delicious. I did end up with a little more than a 1/2 tsp of unpopped kernels which would reduce the calorie count some, but I attribute this to the fact that this jar of popcorn has been in the cupboard for awhile. The lid has little holes in it so that if you're splurging and want buttered popcorn you just put the butter in the lid and it melts as it pops, dripping perfectly into the popped corn.


The features that I like the most about the popper:

  • It's perfectly sized for a snack and I can control the amount depending on how many calories I have in my calorie budget that day
  • You can use plain, organic kernels so you don't end up eating a bunch of chemicals that are in normal microwave popcorn or even bagged popcorn
  • It's easy to clean
  • It has silicone around the glass, on the handle, and the lid so it's easy to handle getting in and out of the microwave
In short, it's a 5-star score!

Thursday, July 7, 2016

Gluten Free Rice Flour Tortilla Chips

My grandchildren have inherited my generation's unfortunate desecration of the food supply in the form of multiple food allergies. Three of my nine grandchildren are coming to visit next week, so the sailing vessel Kintala's allergy-free test kitchen is in full testing mode today for new recipes. I actually came up with this recipe as a result of trying to make some form of rice tortilla or wrap. My original attempt didn't result in anything appealing so, in an effort to salvage what I had made, I decided to convert them to tortilla chips to use for scooping hummus. They were a grand success. If you happen to have a gluten free issue, please try these. They are super quick and easy to unbelievably inexpensive, and are much more delicious than any I've bought in the store.


Measure 1/4 C white rice flour into a small bowl. Organic rice flour is best, but I didn't have any at the moment so I used regular. Add 1/4 tsp of olive oil and 1/8 or less tsp of salt to the rice flour and stir.
Add a little water at a time while stirring with a wooden spoon until a ball forms and cleans the sides of the bowl. It should look and feel like play dough - soft but not sticky. If you add too much water, don't worry - just add a bit more rice flour until the consistency is correct.
Divide the dough into two balls.
Sprinkle a bit of rice flour onto a square of waxed paper or parchment paper. Press the ball out into a circle with your fingers.
Sprinkle a bit more rice flour onto the dough and top with another piece of waxed paper. Roll the dough with a very light touch on the roller. Stop periodically and remove the paper, add a bit more rice flour, replace the paper, flip, and repeat. Do this until the circle is about 9" across and as thin as you want your chips. Thinner yields lighter chips, thicker yields crunchier chips. Just remember that the thinner the dough, the harder to transfer it to the pan.


Remove the top paper and, using the bottom paper, flip onto a medium hot griddle. Remove the paper that you used to transfer it. Cook until small bubbles appear, flip, and cook again until the dough is set and the edges start to lift. It will not get browned so don't over cook it.
While the tortilla is cooking, heat a couple cups of oil in a small pan to between 350° and 360°. It doesn't take much oil. If you are making the cinnamon sugar version of these, I think you could use coconut oil but I haven't tried it. I use our infrared thermometer for this and it works well.


Cut the tortilla into 6 wedges with a knife or pizza cutter.
Place 3-4 of the wedges into the hot oil. They will immediately puff up and float to the surface. Cook them for about a minute (depends on your oil temp) until the bottom starts to get golden, then flip them with a slotted spoon.


Cook them another minute or less until the second side is golden.
Remove them to a cooling rack or cookie sheet lined with paper towels to drain.
Immediately salt them while still warm. You can use a fine regular salt, garlic salt, cinnamon sugar, or any other seasoning. The finer the consistency of the seasoning, the better it will stick. Cool them completely. I'm not sure about storing them. I will update later. At this point, I think it's best to make small batches that you will use right away. One of these recipes makes 12 chips. What you see here is two recipes' worth.

These are super crispy and excellent for scooping hummus.


Enjoy!

Friday, February 6, 2015

Beer Cheese Dip

A friend of ours recently brought this dip to sundowners in our cockpit. It's incredibly easy, tastes great, and the ingredients are easy to store on a boat. Besides, it has the side benefit of not using an entire bottle of beer so you <ahem> have to drink the rest. Thanks Tricia for an excellent recipe!


Ingredients:

8 oz of cream cheese (whipped or regular either one works great)
1/2 package of Hidden Valley Ranch dressing mix powder
Cheddar cheese grated
Beer

Directions:

Beat the cream cheese in a small bowl until creamy. You can do this by hand if you don't have a mixer and it will work just as well. Add the Hidden Valley Ranch dressing mix and stir it in well. Add as much cheddar as you want. The more cheddar, the cheesier the taste. I used a very sharp cheddar which seems to balance the beer flavor well.  Add a little beer at a time, stirring well in between. Add enough beer to make a light, spreadable consistency. You can vary the flavor of this dip a tremendous amount by what beer you choose. I used Blue Moon for this sample and the taste is pretty light. If you use a darker beer it will make the taste much richer. Choose what you like. Serve it with crackers, fritos, pretzels or veggies.

Friday, October 3, 2014

Sweet Potato Chips

If you can't remember what snack food has the tag line, "betcha can't eat just one", you can probably stop reading now. These are the most delectable, addicting, snack foods on the whole earth. They are time consuming, but not hard to do, and they will impress your sundowner crowd to no end.  Just don't come back to me complaining about the few extra pounds you're carrying! Here are the ingredients, simple as they can be. If you're worried about using a lot of oil for frying, I keep mine in a jar and reuse it over and over again. Just filter it through a coffee filter when it's still a bit warm and then refrigerate it to keep it fresh. You can get at least 4-6 uses out of it before you have to throw it out. Use a smaller pan if you want to use less oil, and do more batches. If you use a low-smoking oil like peanut oil then you won't smoke up the inside of the boat.


Ingredients:

3-4 medium sweet potatoes, not peeled
cinnamon sugar for a sweet snack or
Sweet and smokey spice mix for savory
Enough peanut oil to fry in a 10" skillet, 3-5 cups.

Directions:

Wash the sweet potatoes well, scrubbing with a brush. Slice them thinly. You can use a mandolin if you have one, but I just use my potato peeler which is a very good, sharp one. A good, sharp knife will do the trick as well if you're patient.

Heat your oil to 350°. As I've mentioned before, I use a Harbor Freight infrared thermometer to check oil temp as well as most other temps in my galley like bread liquids and pizza pan temp. You may have to adjust your oil temp as you work your batches as different oils and different pans and different stoves react, well, differently.

Lower enough chips into the oil with a slotted spoon to cover the surface in a single layer. Cook them until they begin to brown but be careful because once they start to brown, they go from golden to burnt in seconds. Remove them to a cookie sheet lined with paper towels and season them before they cool. Serve immediately. These do not keep well, and will begin to soften within hours due to the high humidity environment of a boat, so enjoy them right away.

Friday, July 20, 2012

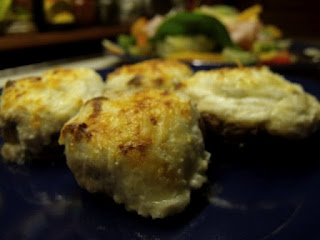
Cheese Stuffed Mushrooms

I used to make some stuffed mushrooms once upon a time that had crab in them. That was before my captain developed a late-in-life rather severe allergy to shellfish (I know, I know...shellfish allergy when you're planning on being a full-time cruiser...). A good friend of ours at the marina was kind enough to pass on his recipe for cheese stuffed mushrooms and they've been a tremendous substitution for the old crab ones. These can be done in the oven or on the grill. They make a great summer weather side dish for chef salad, our meal for this evening on the boat.

Ingredients:
1 14oz package of mushrooms
8 oz package of Neufchatel cheese
1/3 to 1/2 cup grated parmesan
1/2 to 1-1/2 tsp garlic salt

Directions:
Wipe mushrooms with paper towel dipped in ice water. NOTE: if you wipe them this way they don't get slimy the way they do if you wash them.  Remove stem and put the mushrooms in a cast iron skillet or 8" square pan.


Mix cheese, parmesan and garlic salt in bowl. Divide cheese mixture in mushrooms evenly, putting a heaping teaspoon in each mushroom indentation.


Top with an additional sprinkle of parmesan. Grill till tender and cheese is lightly browned or bake at 400° till tender and cheese is lightly browned, about 20-25 minutes.


When I do these in my boat oven I need to put them under the broiler the last 5 minutes.

Enjoy!

Recipe courtesy of Kort Juenger, Boulder Marina


Saturday, March 10, 2012

Mexican Dip

This is one of our very favorite recipes.  It's incredibly easy, quite fast, and is a great way to get to know people because there's enough to share and it's fun to eat. It's also made, baked, and served all in the same pan so there's very few prep dishes.  Hope you enjoy!

Ingredients:

1/2 large onion, chopped
1 TBL olive oil
1 to 1-1/2# lean ground beef

small can of diced tomatoes and chilis or 1/2 C. salsa
1 can fat-free refried beans
1 envelope of taco seasoning or equivalent spices to taste
8 oz sharp cheddar, shredded
sour cream
tortilla chips - heavier ones that don't break easily

Directions:

Heat olive oil in cast iron skillet till shimmering.  Add chopped onion. Cook 1-2 minutes stirring constantly until just turning clear.


Add ground beef.  Cook until no longer pink.
Add tomatoes or salsa, beans and taco seasoning.  Stir till combined. Spread evenly in skillet.  Wipe top edge of skillet clean with paper towel. Sprinkle cheddar on top.


Bake at 375° for 20 minutes or until the cheese is bubbly. Spoon onto a plate with sour cream and dip chips. Serve with cold beer!