Thursday, May 22, 2014

Pumpkin Coco-Nut Muffins


When we were in the Bahamas this winter, coconuts were everywhere for the taking. Any walk could yield a dozen coconuts if you were so inclined to clean them. We really like fresh coconut and snack on it like we do peanuts and fresh coconut, in particular, lends a sweetness and moistness to baking that you just can't find anywhere else. Toward the end of our two month stay (the reason for lack of posts here since internet there is not fast enough for pictures), we picked up an extra coconut and cleaned the outer husk off but kept the hard shell inside and took it with us back to the States. One of our good friends came to Nassau to make the crossing back over with us and the coconut happened to be residing in the aft cabin where he was staying. He happened to comment one day that the coconut seemed to be staring at him, and after taking a good look I had to agree. One thing led to another, and soon the coconut had a face drawn on and a name, "Coco". Well Coco met his demise this week since my food-allergy-prone grandsons arrived and required some coconut-laden breakfast treats.

Muffins are one of the easiest baked goods to make gluten-free so we have them pretty frequently when the kids are around. These muffins are extremely moist and flavorful and will be our favorite one now, changed occasionally with the addition of seasonal fruit, raisins, or dates. Whether you're gluten sensitive or not, these muffins are a great way to start out the day.

Ingredients
1-1/2 cups oat bran
1/2 cup fine cornmeal
1 cup freshly grated coconut, divided in half
1/2 cup packed brown sugar
2 tsp baking powder
1 rounded tsp cinnamon
1/2 tsp nutmeg
1/2 tsp salt
1 egg
1 cup canned pumpkin
1/2 cup almond milk + 2 Tbl
2 Tbl coconut oil


Directions

Preheat oven to 400°. Mix the dry ingredients in one bowl and set aside.


Mix the egg, pumpkin, milk, and oil in another bowl and set aside.


Lightly grease the bottoms of 12 muffin tins with extra coconut oil.  Mix the wet ingredients into the dry ingredients and stir only until combined and the dry ingredients are incorporated. If the batter is dry, add the extra 2 Tbl of milk. Humidity plays a huge factor in muffin recipes and the amount of liquid required. Do not over mix. This is the number one mistake people make when baking muffins. If you over mix the batter, the muffins will be dense instead of tender.


Spoon the batter evenly into 12 muffin cups. Sprinkle the remaining half cup of coconut on top. Bake at 400° for 18-20 minutes until toothpick inserted in center comes out clean. If your oven runs hot, check at 15 minutes. On the boat, it takes me 20-22 minutes. Ovens vary.

Coco, may you rest in peace.


Thursday, January 16, 2014

Green boat

There's a pretty notable movement to have a green boat these days. Solar powered, wind powered, electric...but I would like to take the meaning of green boat in another completely different direction.

My daughter recently read an article about how NASA was using plants to detox the space station from chemicals and mold. Number one on the list was English Ivy. While shopping for something totally unrelated a few days later I happened on a reduced rack of small 4" potted plants and picked one up as an experiment. I was skeptical, I admit, as a boat is so full of mold potential even if there aren't any leaks, just due to the amount of condensation present. I was also concerned about the wide temperature swing in the boat, but the tag on the plant assured me that it could withstand a 40° to 95° range. On our home lake that would encompass about 2 months of the year, but we were preparing to leave to go cruising and were determined to stay well within that range.


I put it in a nice spot on a medium light shelf above my closet next to a port, and went home for the weekend. When we came back the following weekend the plant was nearly dead. I wasn't surprised, but disappointed. When we went back to the city at the end of the weekend I forgot to take the plant home with me and on returning the next weekend expected to find it completely dead. To my surprise, there were several small, new green leaves on one of its stalks. The only thing I can attribute it to is that there was so much mold in the boat that it shocked and took a bit of time to adjust. Whatever the reason, the plant is doing well and adds an element of color to the interior of the boat that does wonders for it. It was a very well spent $1.74.


By the way, when my daughter came to visit she promptly named the plant Starbuck after the chief mate in Moby Dick, but I'm thinking these days his namesake is more likely the Starbuck of Battlestar Gallactica fame since he's endured some real trials and yet continues to survive with a bit of feistiness. He's become a qualified crew member aboard Kintala. So the next time you're near  a clearance rack of 4" potted plants, see if one doesn't call out and tell you he wants to go cruising.

Thursday, January 9, 2014

Vienna Snack Loaves

This recipe is one of my absolute favorites. It's a versatile boat bread recipe that can be shaped into 2 large italian style loaves, 3 medium everyday cut bread with butter and cheese loaves, 4 large hoagie buns, or 8 sandwich rolls. I usually make a half recipe, which is what follows, mostly because if you're in warm weather the bread will mold before you can eat it all if you do a whole recipe. You can double it though if you have fridge space, or you're having company, or you just feel like being nice by delivering a warm loaf to someone. The recipe comes out of my favorite bread cookbook, The Red Star Centennial Bread Sampler, which is out of print but if you ever find it at a used bookstore I highly recommend you pick it up. Mine is heavily taped up from all the years of use.

Ingredients:

2-3/4 to 3 cups bread flour
1 package instant yeast
1-1/2 tsp sugar
1-1/2 tsp slt
1/2 cup plus 2 Tbl water
1/2 cup milk
1 Tbl butter


Directions:

In a large mixing bowl stir together1-1/4 cups of the flour, yeast, salt and sugar. Set aside.


 Heat water, milk and butter in a small saucepan until it reaches 120°. The butter does not need to melt. I've been using a trigger style infrared thermometer to test the liquid with, one that we bought to use on the engine but it works really great for bread as well.


Mix the heated liquids into the dry ingredients and beat for 3 minutes with either a hand mixer or a wooden spoon. It should get totally smooth and bubbles should begin to appear. I've been using a kitchen timer app on my phone that works pretty well.


Add enough of the rest of the flour in by hand to make a soft dough. It will be sticky as you work it with the spoon but should begin to take the shape of a ball and to clean off the sides of the bowl. Put a little flour onto your work surface and begin to knead the bread. Knead it for 5-8 minutes or until it gets elastic and smooth. If you have never kneaded bread you can watch my video and instructions in the Thin Crust Pizza Recipe for help. Clean your bowl and oil the inside of it. Put your ball of dough in the bowl and turn it over so the top is oiled. Cover the bowl with foil and then keep it somewhere warm and free of drafts until it doubles in bulk. You can make a warm space by turning on your oven for a few minutes and then turning it off and putting the bowl inside, or by setting it on a heating pad or a hot water bottle. It will take 30-60 minutes to double depending on the ambient temperature. It should look like this.


 After the dough has doubled, take your fist and punch it down in the middle. Then take the edges and fold them to the middle and work around until all the air bubbles are gone.
 Cut the dough into two pieces. Press one piece into a rectangle about ten inches long by 5 inches wide.
Start rolling the long edge toward you and press it into the remaining dough along the bottom ede of the roll. Try not to trap any air bubbles into the roll.
When it's all rolled up, turn it over and pinch the edge together.
 Place the pinched edge down on a square of parchment paper cut to fit your pan and sprinkled with cornmeal. Cut diagonal slits into the top with a sharp knife.
Take the other half of dough and cut it into 4 equal pieces. Press each piece out into a small rectangle and roll it toward you like the loaves. If you want longish rolls then stop there. If you want rounder rolls then take that mini loaf and begin to roll it from one end to the other, pinching as you go and sealing it like the loaf on the bottom.
 Grease the tops of the loaves and/or rolls with olive oil or cooking spray.
Put them in a warm place free of drafts until they're almost doubled in size. If you are not preheating your oven in order to save propane, then you want to start to bake them when they are a little less raised. They will finish raising as the oven preheats. This can take some experimenting on time so I suggest that the first time you make this recipe that you preheat your oven.


Bake them from 20-35 minutes, again depending on your oven. Cool completely before slicing or they will crush. This is a very tender, moist bread.

If you have troubles, know that yeast bread failures are usually a fault of one of these situations: your liquids are too hot and you have killed the yeast, you are using old yeast, you are using self-rising flour, or you have tried to raise the bread somewhere drafty. 

If you have any other difficulties please feel free to email me, svkintala att gmail dott com.

Tuesday, January 7, 2014

French Breakfast Puffs

The key word in the title of this blog is "Comforts". The food on here is comfort food, pure and simple. Emotionally healthy, but diet food? Not so much. So there is the disclaimer. Now, on to breakfast this morning.

In my defense, it was cold on the boat. 43° outside, and 47° inside with no heater. Certainly not the vicious -20° wind chills my daughter eldest was experiencing in Iowa City, IA, but it called for some heat nonetheless. So rather than cold cereal, or even oatmeal, some sort of baked good was called for.

This recipe was given to me by my nephew years ago as part of a church youth group recipe book. I haven't made it in years due to our attempt to eat healthier, but I drew it out of the recipe stash today and simply refused to think about healthy and decided to focus on warm. Comfort food folks...

French Breakfast Puffs

3 cups all purpose flour
3 tsp baking powder
1 tsp salt
1/2 tsp ground nutmeg
1 cup sugar
1/3 cup shortening
1/3 cup butter
2 eggs
1 cup milk

Coating:
6 Tbl butter, melted
3/4 cup sugar
3 tsp cinnamon


Mix flour, baking powder, salt and nutmeg in one bowl. Set aside.


Cream butter and shortening until light and fluffy. Add sugar. Cream again. Add eggs and blend till mixed.


These puffs are mixed using an alternating method. Add 1/3 of flour mixture and mix until dry ingredients are incorporated...


Then add 1/3 cup of the milk and mix well. Repeat, alternating flour and milk, mixing well in between.


Divide into 12 greased muffin cups. Bake at 350° for 20-25 minutes or until just turning golden and toothpick inserted in center comes out clean.


While puffs are baking, mix cinnamon and sugar and set aside. Melt butter.

Remove puffs from oven when done and transfer to wire rack. While still warm, roll tops in melted butter and then cinnamon sugar.

Serve warm.


Saturday, November 30, 2013

Braided Tuna Loaf

It's always a good thing to have a can of tuna in the pantry on a boat, just in case you don't have any meat hanging out in the fridge waiting to be used. I'm not a huge fan of tuna, probably a result of excessive amounts of tuna noodle casserole served at the dinner table when I was growing up. That being said, this recipe is one of the few that I really like and graced our family table when my kids were growing up. The sauce is one that will merit a separate blog entry when I get some time but for now it will do here.

Braided Tuna Loaf

1 Recipe of Cheddar Drop Biscuits on the sidebar, using only 2/3 cup milk and no cheese.
1 can of chunk white tuna
2 Tbl minced onion
1 beaten egg, divided
salt and pepper to taste
1/2 c shredded cheddar


Begin by making the recipe of biscuits on the sidebar, using only 2/3 cup of milk and no cheese in the dough. Roll the dough out on a floured surface until it's about 10" x 14". Mix tuna, onion, 1/2 of beaten egg, salt and pepper and cheese. Spread evenly down the middle third of dough. Using a sharp knife, make cuts through the dough from the outside edge just to the filling at an angle, making 6 or 8 slanted strips.


Fold the strips over alternately to make a braided top. Mix remaining egg with a little water and brush over the top. Bake at 400° for 20-35 minutes or until golden brown. While it is baking, make the cheese sauce.


No Measure Cheese Sauce

This cheese sauce is a variation of a standard white sauce, which is also wonderful to use for so many other things like potato soup, cream of mushroom soup, sausage gravy, or macaroni and cheese. It's one to master for sure!


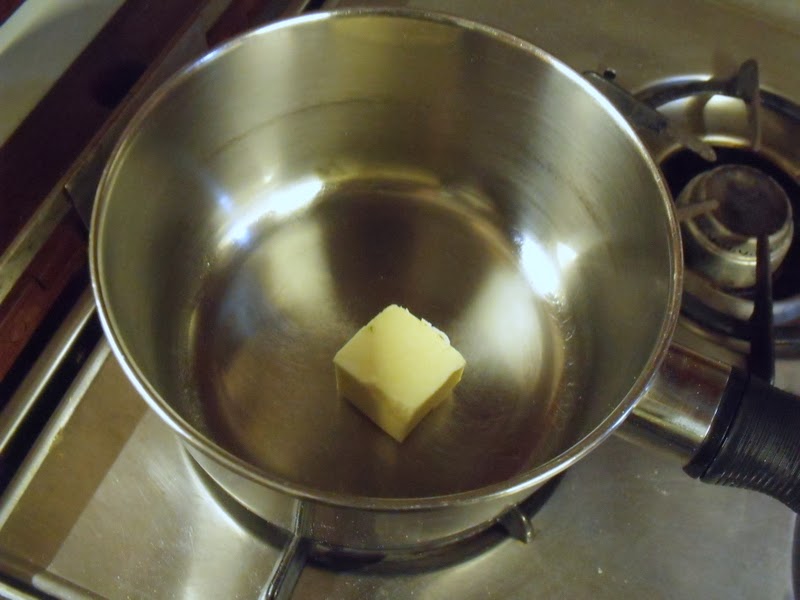
Melt a hunk of butter in a saucepan on medium. The size of the butter chunk will determine the quantity of sauce you end up with. 4 Tablespoons will yield about 1-1/2 cups of sauce.


Add enough flour to make a very thick paste, and stir until the butter separates from the pan and kind of chunks up.


Add milk a little at a time, stirring hard with a wire whisk in between. The first addition should leave it looking a bit like mashed potatoes.


The second addition should leave it looking a bit like frosting.


The third addition it will be thick white sauce. If you're making it for a recipe that needs thinner sauce then just add a little more milk and whisk.


Add at least a cup of grated cheese. Use your imagination, and all the leftover chunks of cheese in your fridge. The more the merrier. You can use swiss, cheddar, american, cream, havarti, parmesan, just mix them all together in there. Add salt and pepper to taste.


Serve the braid in thick slices with the cheese sauce over top. A side of brocolli is great with this.

Wednesday, November 27, 2013

Aunt Betty's Pumpkin Bread

Disclaimer: If you are on a diet, if you are only eating healthy, or if you're an Al Gore fan and are trying to be a vegan, stop here and go to another post.

Every holiday in my family as I was growing up involved trips to my Aunt Betty's and she is, to this day, one of the best homestyle cooks I have ever known. As kids we would eat the obligatory plateful of turkey, potatoes, stuffing and green beans, but it was only so that we could be allowed the only treat we really wanted, Aunt Betty's pumpkin bread. It would plop on our plate thickly sliced and, as we grew older, with a dollop of lemon curd or a thick spread of cream cheese slathered on top. The tradition continues in my own family, where pumpkin pie almost always takes a back seat to pumpkin bread.

Thanksgiving has always been my favorite holiday, mainly because you get the benefit of family presence without the aggravation and stress of presents and the money behind them. This Thanksgiving will be one of the few that we aren't with our kids and grandkids, although it seems to be happening more often as they get older and have other families involved in their holiday celebrations, so it seemed fitting to remember the holiday with a rainy baking afternoon. I hope that this recipe will become a tradition of yours as well.

If you're not a baker, the secret to all quick breads and muffins is what is called the two bowl method. This means that you mix all of your dry ingredients in one bowl and all of your wet ingredients in another bowl. You preheat your oven and get your pans ready and then the instant that you're ready to bake you mix those two bowls together quickly, just until the dry ingredients are mixed in and aren't visible anymore then put them immediately into the oven. If you overmix the bread or muffins will come out tough, and if you let it set for awhile they will be dense.

 Aunt Betty's Pumpkin Bread

3-1/2 C flour
2 tsp baking soda
1-1/2 tsp salt
1 rounded tsp cinnamon
1 tsp nutmeg
3 C sugar
1 C chopped pecans or walnuts
4 eggs
1-1/2 C canned pumpkin
1 C vegetable oil
2/3 C water


 Place all dry ingredients in a large mixing bowl. When I make this on the boat I cut the recipe into 3/4 or it won't fit in either my bowl or my oven. A  half recipe will make two small 8 x 4 loaves, a full recipe will make three 9 x 5 loaves or four 8 x 4 loaves. I also sometimes make these in 13oz coffee cans which for some reason leaves the bread without a hard crust and makes nice loaves to wrap and give away. A full recipe will make 3 of those cans. Be sure to wash well and grease well and remove any plastic film labeling.


 Mix all the wet ingredients in another bowl with a whisk. Sorry for the blurry picture here but we're having a bit of bad weather and it's hard to keep the camera still when the boat is rocking all over the place.


Prepare your pans. When I'm using foil pans or regular bread pans I spray them with non-stick spray and then line the with waxed paper and spray lightly again. If I'm using the coffee cans I spray them well and dust them lightly with flour.

Preheat your oven to 350°


 When the oven is preheated, mix the wet ingredients into the dry ingredients and stir quickly with a wooden spoon, just till the dry ingredients are no longer visible.


Divide the batter evenly among your pans and put them in the oven.  Bake them until a toothpick inserted comes out clean. This can vary wildly depending on the pans you used and your oven. If you use dark pans it will take less time and you may have to lower the oven temp just a little. If you use aluminum pans it will take longer, as will the coffee cans. It will take somewhere between 45 and 60 minutes.


Cool the loaves on a wire rack until just barely warm to the touch  and then turn them out and peel off the waxed paper. Resist the temptation to turn them out early as they will crack. These can be frozen and will actually taste better after being frozen, so I often bake a half dozen or more loaves and keep them in the freezer for gift giving at Christmas. Enjoy!